About Me

My photo
Newcastle upon Tyne, Northumberland, United Kingdom
This is a blog I use to share my papercraft projects. I make them for friends and family, as well as selling them to fund my craft stash. You can get in touch with me at loumac03@gmail.com if you have any questions or would like to place a commissioned order.

Wednesday 25 September 2013

Glitter or Snow..

or in my case.. BOTH! Simply because the two happen to go hand in hand in my opinion!!

It's a new theme this week and the DT ladies are showing you all creations with

Glitter or Snow

I only ever us 3D foam pads to create depth on my cards, so I used my tweezers to be super careful and super sure about there I placed each layer before I pressed down.

I backed the image panel and my gorgeous subtle papers from First Edition Silent Night collection onto black card stock to make it pop and add a little modern twist.


I used a little sentiment panel from the decoupage set to stamp my sentiment from Waltzingmouse. I added some organza ribbon from The Ribbon Girl, a few little buttons, a crochet flower and some punched stars which I coloured in Stickles. I die cut some vellum using the Die-namics Let it Snowflake dies and layered them under the buttons and flower. 

Oh, and like you hadn't seen.. I used my Tonic Edger 2 punch.. again!!

That's it from me for today! Stay chilly. xx 

Tuesday 24 September 2013

One for the Boys

So here was me thinking I had had this post all typed up and ready to go, scheduled, the lot.

Obviously not.

I'm useless.

I got my head up my butt tryna revise for my exam next week and tryna relax with some colouring on the evenings after work. Gahhh!!

Enough waffle..

As you probably already know, there is a new challenge up over at Passion for ProMarkers. This time our lovely Marie. She wants to see
ONEZ FOR THE BOYZ

Yip!! We wanna see those boy/ male creations!! ;)

Head over to the BLOG to see the prize up for grabs!! 


I can't quite recall the name of this cutie from TGF, but he's loveable, right?

I've coloured him with ProMarkers to match my papers from MME and I've tried to give him a little plaid turn up on his sleeve - not sure how well that went! Hah. I tried to keep the whole design pretty simple as it was for a young boys birthday!

That's all I got for ya. Off to organise my notes and get ready for revision night #24683 hahah!!

Lurv.

Wednesday 18 September 2013

We'll Miss You

Good morning! :) It's my turn to give you some inspiration for you using products available at My Mum's Craft Shop.

We had a lovely girl leave us at Homey B's a few weeks ago, and I just had to make a card for her from us all. I used the adorable Matilda from the Wild Spouts collection at The Greeting Farm, as it looks just like her. If ever there is something you'd like to buy from the shop, but it is out of stock or not appearing on the website, just drop Kitty a line and she'll be more than happy to help you out!!

I decided the colour the hair up a little different than normal, with less strokes and more solid colour. I kinda like how it turned out, and will keep practicing it. It's good to help practice you're blending and transition between lightest and darkest colour.


So I picked out some papers from My Minds Eye Collectable Notable 6x6 pack, and matched Matildas clothes to the colours with my ProMarkers. I cut apart one of the sheets of paper with the miniature note cards on to stamp my sentiment with Memento ink

I kept this card pretty simple and let the paper and image speak.. but of course my favourite tool at the minute made it's way in somehow *wink.. the Tonic Edger 2 punch. LOVE IT! I cannot recommend it highly enough. I know I keep banging on about it, but guys.. you just gotta try it!

So that's all from me this week!! Head over to the My Mum's Craft Shop BLOG and see what other kinda gorgeous inspiration the girls have supplied you with this week.

xo

Wednesday 11 September 2013

Season's Greetings

Wednesday morning again, so it's time to share some inspiration using products you can pick up at My Mum's Craft Shop.

This week, Kitty challenged us to use 'Something Round' on our cards..

Naturally the first thing I reached for was the Winter Wreath die from MFT Die-Namics


I die cut four wreaths and layered them together to create more depth in the card. I die cut some buttons using the Die-Namics Button Quartet dies, only using the smallest button, to decorate my wreath with some dramatic black cardstock. I also added some punched stars which I covered with Gunmetal Stickles, some real buttons and a matt black brad I found when I was clearing my desk! ;) Aren't they the best embellishments? LOL!! Oh, and before I forget, I used the Let is Snowflake die set from MFT too, to create some little vellum snowflakes to layer under some stars.

I sewed the real and die cut buttons onto the card with some twine, because I just can't help myself.

Ohh, my paper. I almost forgot about the paper. The papers are from the delicious First Edition Silent Night pack. The thing I love about this paper collection is how many neutral colours there are, with just the slight pop of blue every now and then. It makes them perfect for any kind of winter occasion and allows you to customise your card with a more bold colour of your choice!! 

That's all from me today guys. Enjoy your Wednesday. xo

Tuesday 10 September 2013

Those Perfect Pets

Well for once in a looong while, I am typing this post up late on a Monday night instead of weeks in advance like usual. My head has been up my butt these past few weeks - so many things going on, but that's all part of life, right? It keeps us on our toes, so I am definitely not complaining. Enough waffle, let's get into the good stuff..

We all love our furry friends, right? Some people more than others, like me. *insert crazy cat lady face here* LOL!! We treat them like a member of the family and will do anything to make them happy. Infact, some of us go out of our ways to make them happy..

This weeks challenge over at Passion for ProMarkers has been picked by the lovely Shelly, she wants to see you colour up those furry friends.

To be in with a chance of winning $10 worth of digi papers from  Michele R Designs, so head over to the blog and join in!!

Now, I know what you're gonna say.. a HEDGEHOG?! Yip, a hedgehog. Do you not think he's adorable?! I was gonna go down the route of cat, or dog, or hamster, or bird.. but hell.. I think these little guys need a break too!!

This image if from Tiddly Inks - Bugs and Kisses. The set comes in both digital form and clear acrylic, I went with the digi. 


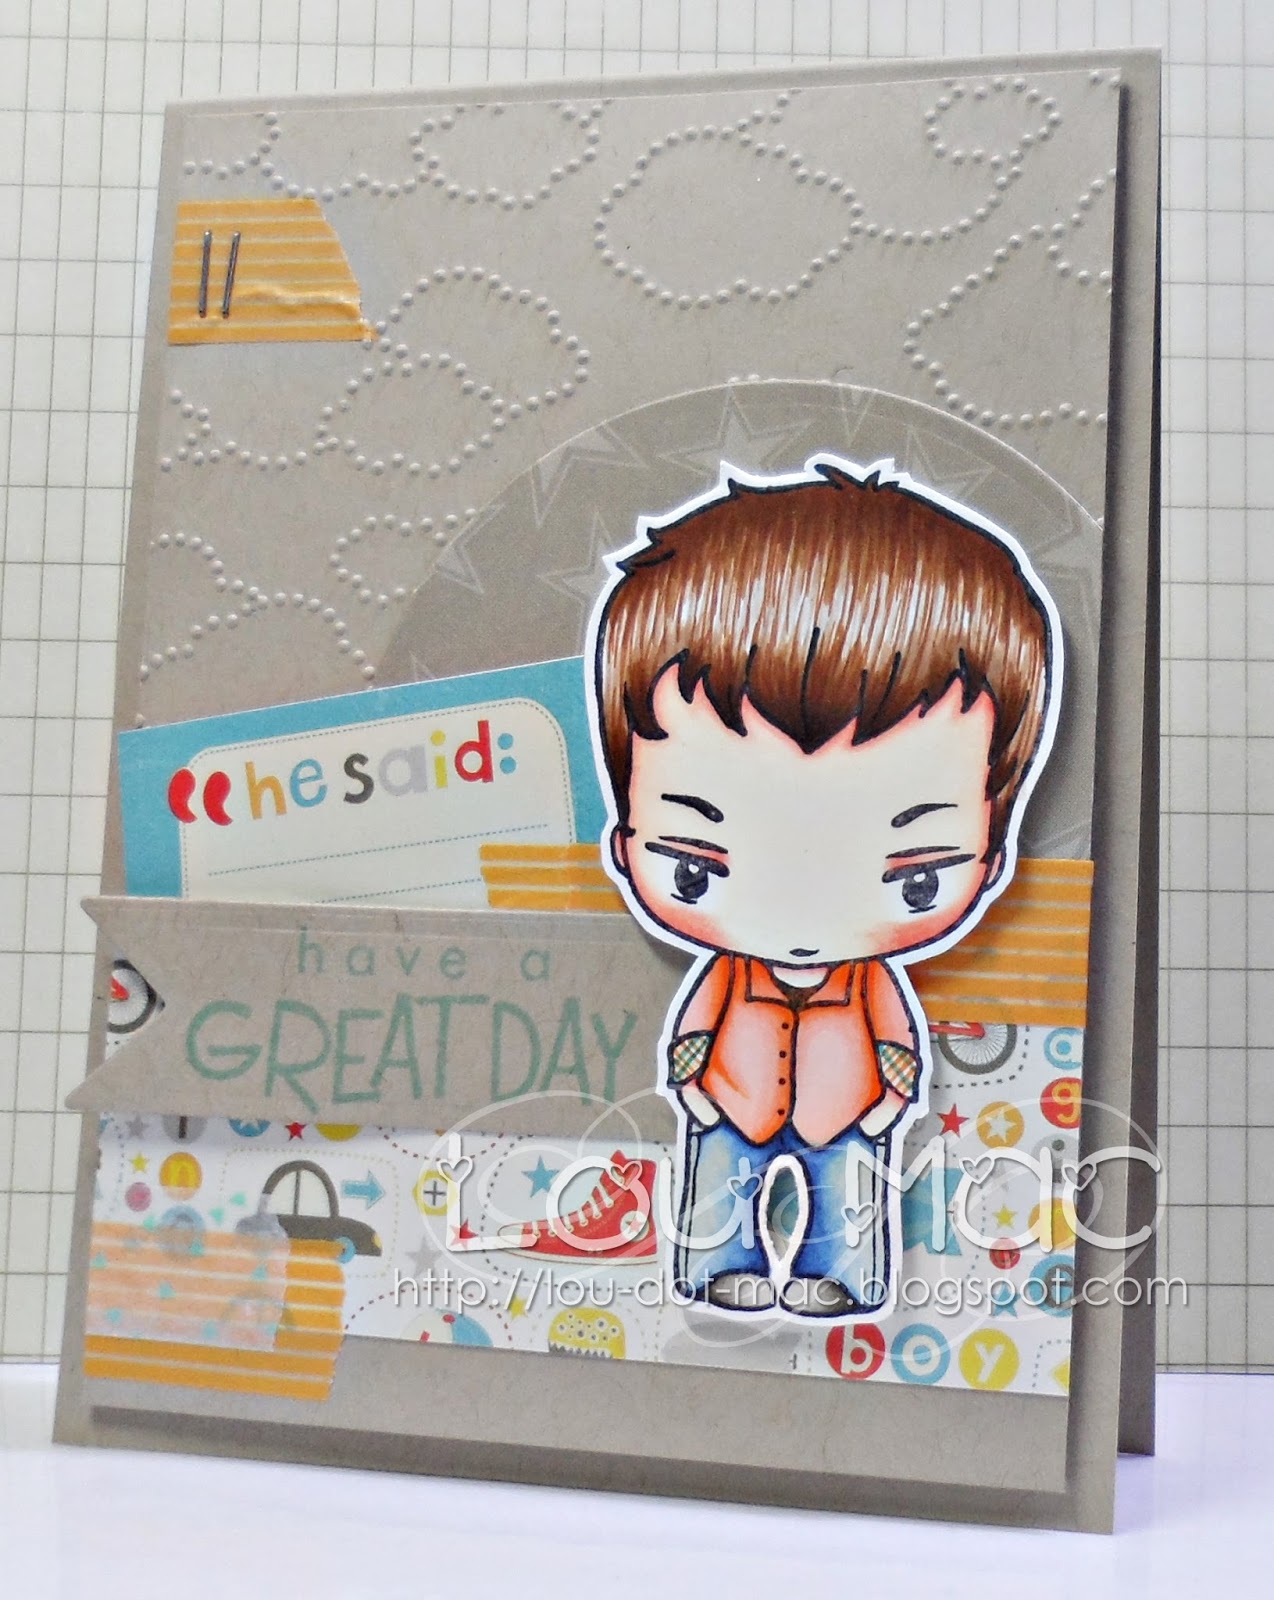
This is a card of firsts for me. First time trying out a new style of clouds that Kristy from Some Odd Girl just rocks so well (obviously I done them NO justice what so ever.. but I do try), as well as trying my hand at a criss-cross style card. For my first proper attempt I wasn't that disappointed in it, but I can see there is a lot of room for improvement.

I used papers from My Mind's Eye Come Away With Me collection. LOVE the rich reds and blues in this pack. So pretty. I coloured up my image to kinda match. I kept the embellishments kinda minimal, which was pretty difficult for a girl who likes to poke brads and sew buttons through her designs. That's something I'm going to have to get my head around with this kinda card design, making sure the inside stays clean and tidy so it doesn't catch on the pull out insert.


Here is a photo of the insert pulled out of the card. I have stamped a greeting from Amy R sentiments in Rhubarb Stalk ink onto another slice of patterned paper from the pack which I have matted and layered using white card and cherry card. I kept it pretty simple as I wasn't too sure where I was going with it all. The size of the insert in comparison with the rest of the card is something else I need to get my head around. All in due course, ladies and gents.

Here is a close up of those clouds that took me hours to do.. you'd never be able to tell.
PRACTICE MAKES PERFECT


That's all I got for ya tonight/ this morning!! I'm off to hit the hay for an extremely well deserved early night!!

Thank you for stopping by. xo

Wednesday 4 September 2013

New Home

Good morning guys. Autumn is definitely on it's way - there is a little chill in the air at night and it's an absolute treat. Now I've just gotta sit and wait for the snow! 

So, on to todays post! It's a free week for the DT over at My Mum's Craft Shop to show you guys some of the products available in the shop and to inspire you to break out your stash!

Going along with a late Summer/ Autumn theme, I decided to use some delicious papers from Echo Park, with some warm reds and oranges. I matted it onto some Papermania KraftStax cardstock


Centre stage are those gooorgeous roses from MFT's Blooming Roses set. I die cut some white cardstock with the Die-namics Rose Bouquet set and stamped the roses using a bunch of Memento inks.

I stamped my sentiment on a die cut from Die-namics Vertical Greetings stamp and die set and arranged my die cut flowers and leaves around the bottom right corner. 

Ohhh, and my latest love, is THIS Edger 2 Boot punch from Tonic. It's the perfect size for creating lovely large, but not too large, scallops for cards! I can see me using this on every card for a long while yet. It's the sizes I've been looking for forever! Try it yourself and see!!

.. aaaaand to finish it all off I added a few Hobby House pearls here and there.

That's all I got for ya today! Peace. xo

Monday 2 September 2013

Conkers - Thank you.

Good evening peoples! :) Thought I'd stop in to show you a card I just whipped up earlier today. Now that is a novelty.. making a card and posting it on the same day! BAM!!

You guys have seen the new Time for Tea Designs September release, right? Scroll to the end of this post or pop over to the BLOG to spy them!! There are some cuties for ya, and a brand new character, Polly - you're gonna love her.

So today, as a break from revision (perhaps a longer break that I could really afford..) I decided to colour up a cutie from the new release and make an Autumn themed thank you card!

This is Conkers. Isn't she adorable?! 

I've coloured her up to match some oooold papers from Basic Grey, that I can't remember the name of. Very dark and earthy colours, not my usual thing, but I kinda like it. Especially that red jumper and matching socks! 


I teamed some Amy R stamps and Whimsy Stamps to create my dual sentiment. I stamped them all in my new little Dew Drop inks! :)
Hmmm.. a length of olive green grosgrain ribbon, some kraft and black twine, a homemade clay doodad, a green flower pin, some handcoloured pearls aaaand a mini wooden peg.. finish up the embellishments. 

So you ready to ponder the rest of the release?


Amazing, no?! Hah!! My most faaavouritest is Frankencutie, followed closely by Conkers and Polly!! Who is your fave?

Can't wait to see what everyone comes up with with this release! 

I'm off to sort out my file and plan my revision for tomorrow.

TEAMIE!! xo

Sunday 1 September 2013

Bikes and mud and stuff..

Yikes. It's the FIRST of SEPTEMBER 2013 already.. Christmas is upon is boys and girls.


In better news though.. the first of the month means a brand new challenge over at My Mum's Craft Shop! This month it's ALL ABOUT THE BOYS!!

I always get comments on the male cards I post on my blog, asking me how I do them?! LOL!! I think a lot of people are intimidated by them, so through out this post I'll try and share a couple tips.

TIP ONE - always use bold, masculine papers. There are tonnes of paper packs out there now that make our job as paper crafters a hell of a lot easier when it comes to boy cards. I think male cards, as opposed to boy cards, are a little different. Choosing a more mature colour palette is important. This time round I went with brown and red, with blue and yellow to accent stuff. For this card I used some delicious My Minds Eye Collectable Remarkable collection! I matted some of this onto Papermania Kraft cardstock from Docrafts. I absolutely love that deep blue patterned paper!! I have added some die cut Postage Stamp borders to the top and bottom using what's becoming a staple in my crafting from My Favorite Things


I chose a motorbike and a background from MIC for my main event, and matted it onto some deep red cardstock (Cherry Cobbler from SU!). TIP TWO - keep the embellishments structured and angular. Avoid flowers! LOL! That's a given. Unless you know they love flowers. I have layered up a bunch of squares, rectangles, pinking circles and die cut letters to create some interest in two corners of the image layer. TIP THREE - buttons. Make use of that button stash. They're the perfect 3D embellishment to create a little extra interest on a masculine card. I also added a few Hobby House Rhinestones in Jubilee Red to match the main colour from my project and to finish up the two embellishment clusters. If you don't fancy buttons or rhinestones, STARS are also another winner!

So that's it from me for today! I do hope you spare some time to join in with us this month! There is plenty of inspiration over at the My Mum's Craft Shop BLOG to help you out!! xo

Search My Blog

My Fellow Craft-o-Holic Followers

Total Pageviews